A note in 5 layers
Palette knife impasto that will still be there in ten years
Knife work fails for boring reasons. Not composition, not colour — the paint was too thin, the support was too flexible, or the ridge was dragged twice instead of laid once.
- Section
- Method
- Support
- Oil
- Drying
- 表面 2 天结皮,完全固化 6–12 个月
- Published
Loading the knife
Pick up paint along the full length of the blade, then wipe the back clean so the knife is a carrier, not a reservoir. A ridge laid with a full blade collapses in the middle; a ridge laid with a clean back keeps its edge.
Press down until you feel the panel, then lift straight up. Angling the blade as you lift shaves the ridge instead of building it. One stroke, one ridge — anything laid twice loses its edge and reads as a smudge.
Ridge height as drawing
Ridge height is a value tool, not a texture effect. Under a raking light a 4 mm ridge of mid-grey reads lighter than a 1 mm film of white, because it intercepts the light and casts its own shadow. Sketch the lighting before you commit: decide where the light comes from, then tilt every ridge so that its leading edge faces it.
Keep the tallest ridges for less than a tenth of the surface. When everything is thick, nothing is thick.
Making it survive
Thick oil paint cures from the outside in, and the outer skin can form in two days while the interior stays soft for months. That skin is not a signal to varnish. Wait at least six months, and a year for anything over five millimetres.
Panel, dry climate and no solvent in the thick layers. If you need the paint stiffer, add stand oil or a cold wax medium in tiny amounts — both raise the film's internal cohesion rather than thinning it.
Ridge height against knife angle
| Blade angle | Ridge height | Reads as | Use |
|---|---|---|---|
| 15° | under 1 mm | flat tone | large background fields |
| 30° | 1–2 mm | soft texture | cloth, ground |
| 45° | 2–4 mm | modelled form | drapery folds |
| 70–90° | 4–8 mm | full highlight | single accents, under 5 % of the surface |
Layer schedule
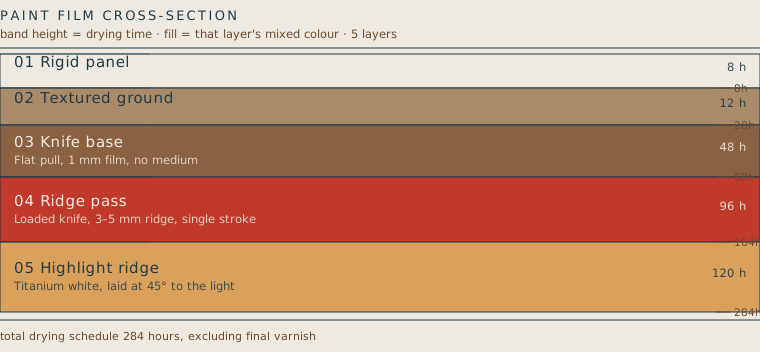
| # | Layer | Technique | Mix | Dry |
|---|---|---|---|---|
| 1 | Rigid panel | Birch ply, 3 coats gesso, sanded | #EFEAE1 | 8 h |
| 2 | Textured ground | Coarse gesso stippled with a dry brush | #A98B6A | 12 h |
| 3 | Knife base | Flat pull, 1 mm film, no medium | #8A6242 | 48 h |
| 4 | Ridge pass | Loaded knife, 3–5 mm ridge, single stroke | #C0392B | 96 h |
| 5 | Highlight ridge | Titanium white, laid at 45° to the light | #D9A15B | 120 h |
Questions that come up
- Why did my impasto ridges crack down the middle?
- Usually because solvent was added to make the paint workable. Solvent leaves a thinner film that cannot support its own relief, so the ridge fails along its own centre line. Firm the paint with stand oil or a cold wax medium instead.
- Canvas or panel for knife work?
- Panel, for anything with ridges above about two millimetres. A stretched canvas flexes under the knife, and the flex works the thick paint loose from the ground over a few years.
Materials and safety note
Drying times assume a ventilated studio at 20 °C and 50 % relative humidity; cold or damp conditions extend them substantially. Solvents and metal-bearing pigments (lead white, cadmiums, cobalts) belong in a ventilated space, out of prolonged skin contact, and lead-bearing paint does not belong on anything a child handles. This page is craft information, not materials-safety, health or conservation advice.